

.svg?format=pjpg&auto=webp)
.svg?format=pjpg&auto=webp)
.png?format=pjpg&auto=webp)


.png?format=pjpg&auto=webp)
Modular Blocks
The Modular Blocks field lets content managers dynamically build and modify components of a page or app, directly from the entry editor. It provides flexibility to assemble rich content structures without developer involvement.
For example, content managers can choose from predefined blocks like:
- Banner: Single Line Textbox and File fields
- Product Details: Title, RTE, and File fields
- Video: File and Multi Line Textbox fields
They can add, reorder, or remove these blocks as needed, allowing them to design complex page layouts independently.
Let’s explore how both developers and content managers can use this field effectively.
Developer
To use Modular Blocks, developers must first add the field to a content type.
- In the content type builder, insert the Modular Blocks field.
- Click + New Block, provide a name (e.g., Hero Banner), and click Create.
- Inside the block, use Insert a Field to add the required fields.
- Repeat this to add multiple blocks within the same Modular Blocks field.
- Rename or delete any block if needed.
Note: You can add up to 5 Modular Blocks fields per content type, with up to 20 blocks in each field.
Warning: You cannot add a Modular Blocks field within a Group field.
Content Manager
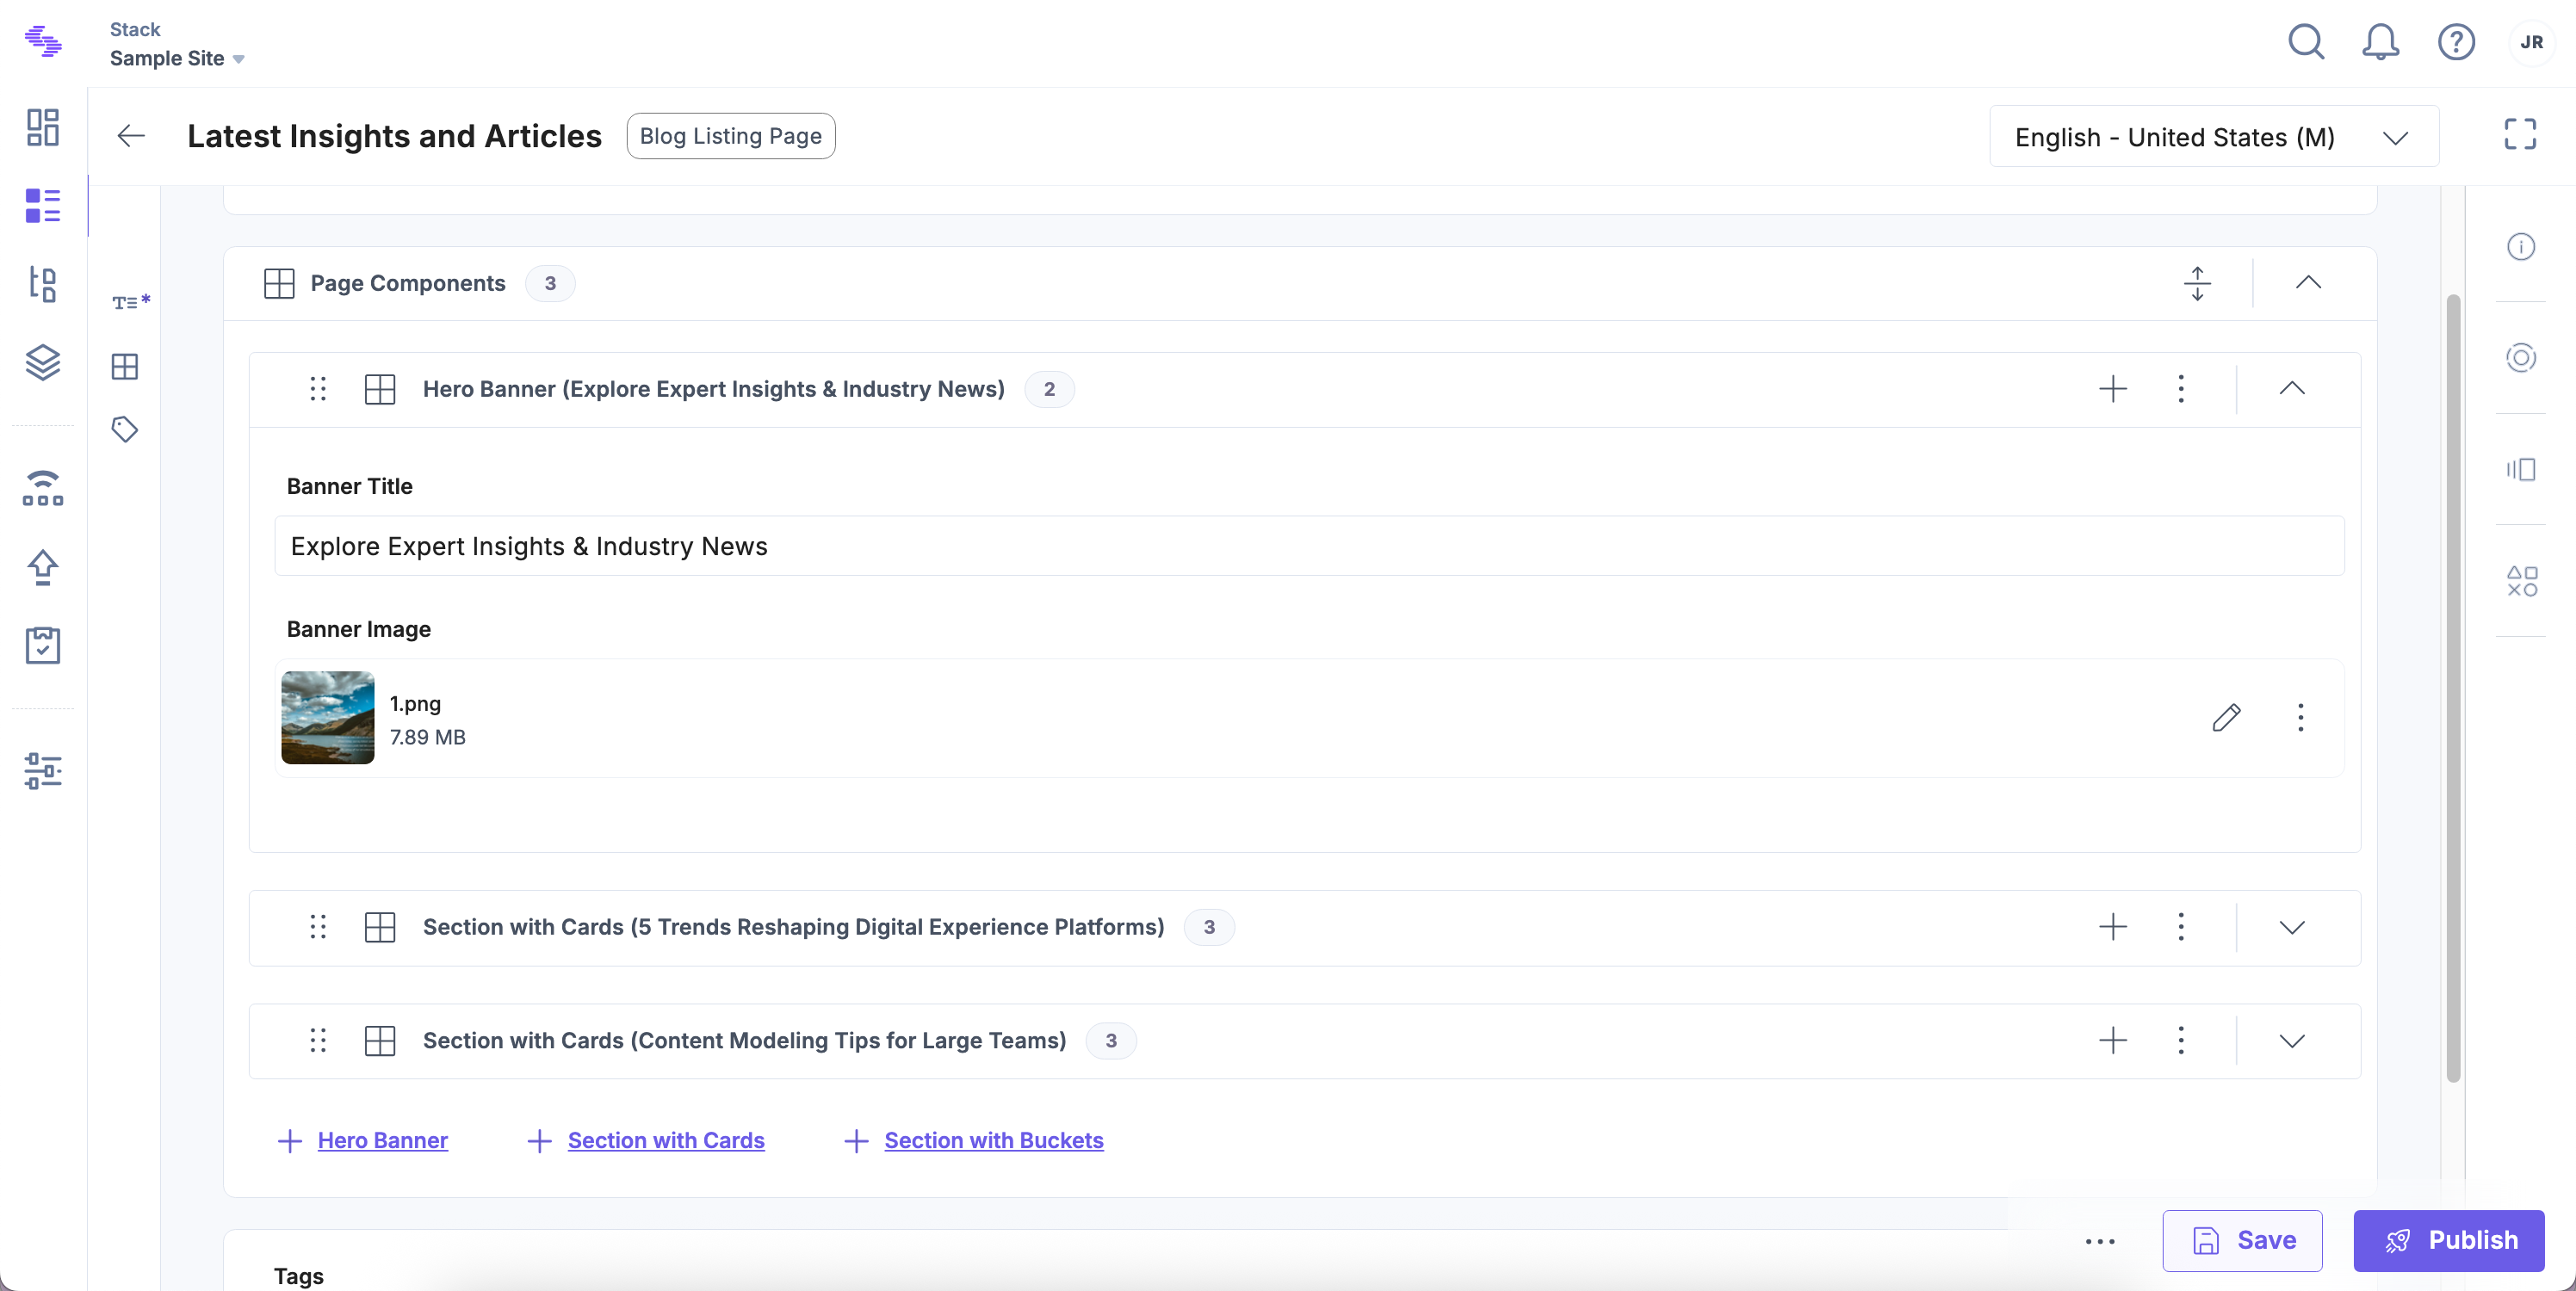
While creating an entry, the Modular Blocks field appears with links to add the defined blocks (e.g., Banner, Product Details). Content managers can:
- Add blocks and repeat them as needed
- Sort or delete blocks
- Insert a block above another using the icons at the top-right of each block
When entering text into certain fields, the block’s title auto-updates to reflect the first field’s value. This occurs when using:
- Single Line Textbox
- Multi Line Textbox
- Date field (shows date in ISO format)
- Title field in a Link field
- Radio or dropdown field (single select)
Real-World Scenarios of Using Modular Blocks
Let's learn how to work with Modular Blocks in Contentstack using a few use cases.
Example 1: Fluid Page Components
Modular Blocks simplify creating flexible content types for multiple pages with varying components.
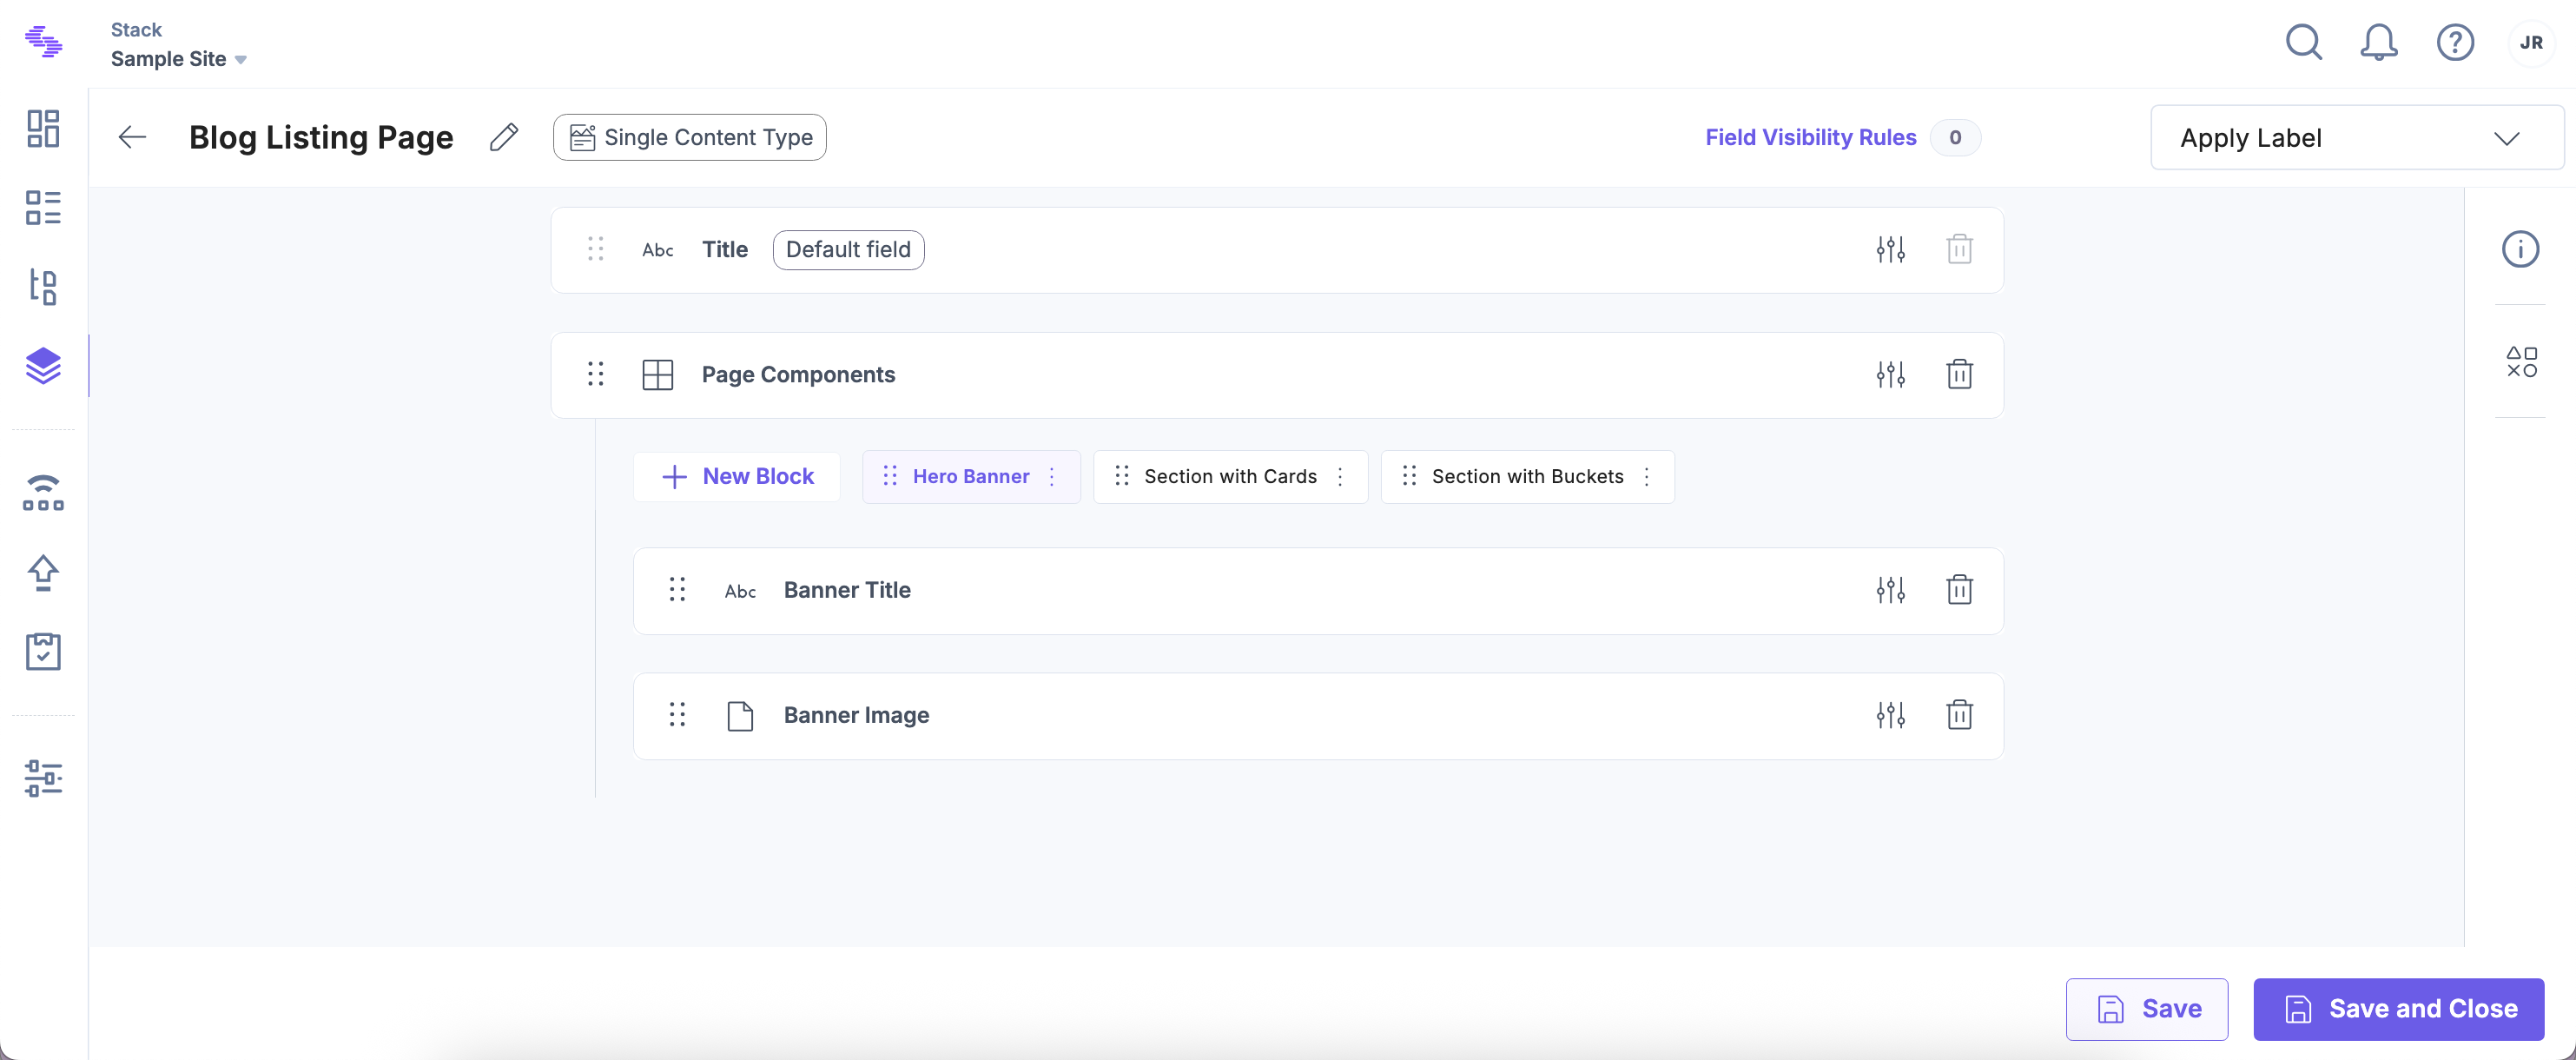
To create a content type with modular blocks, log in to your Contentstack account, and perform the following steps:
- Go to your stack and click the “Content Models” icon.
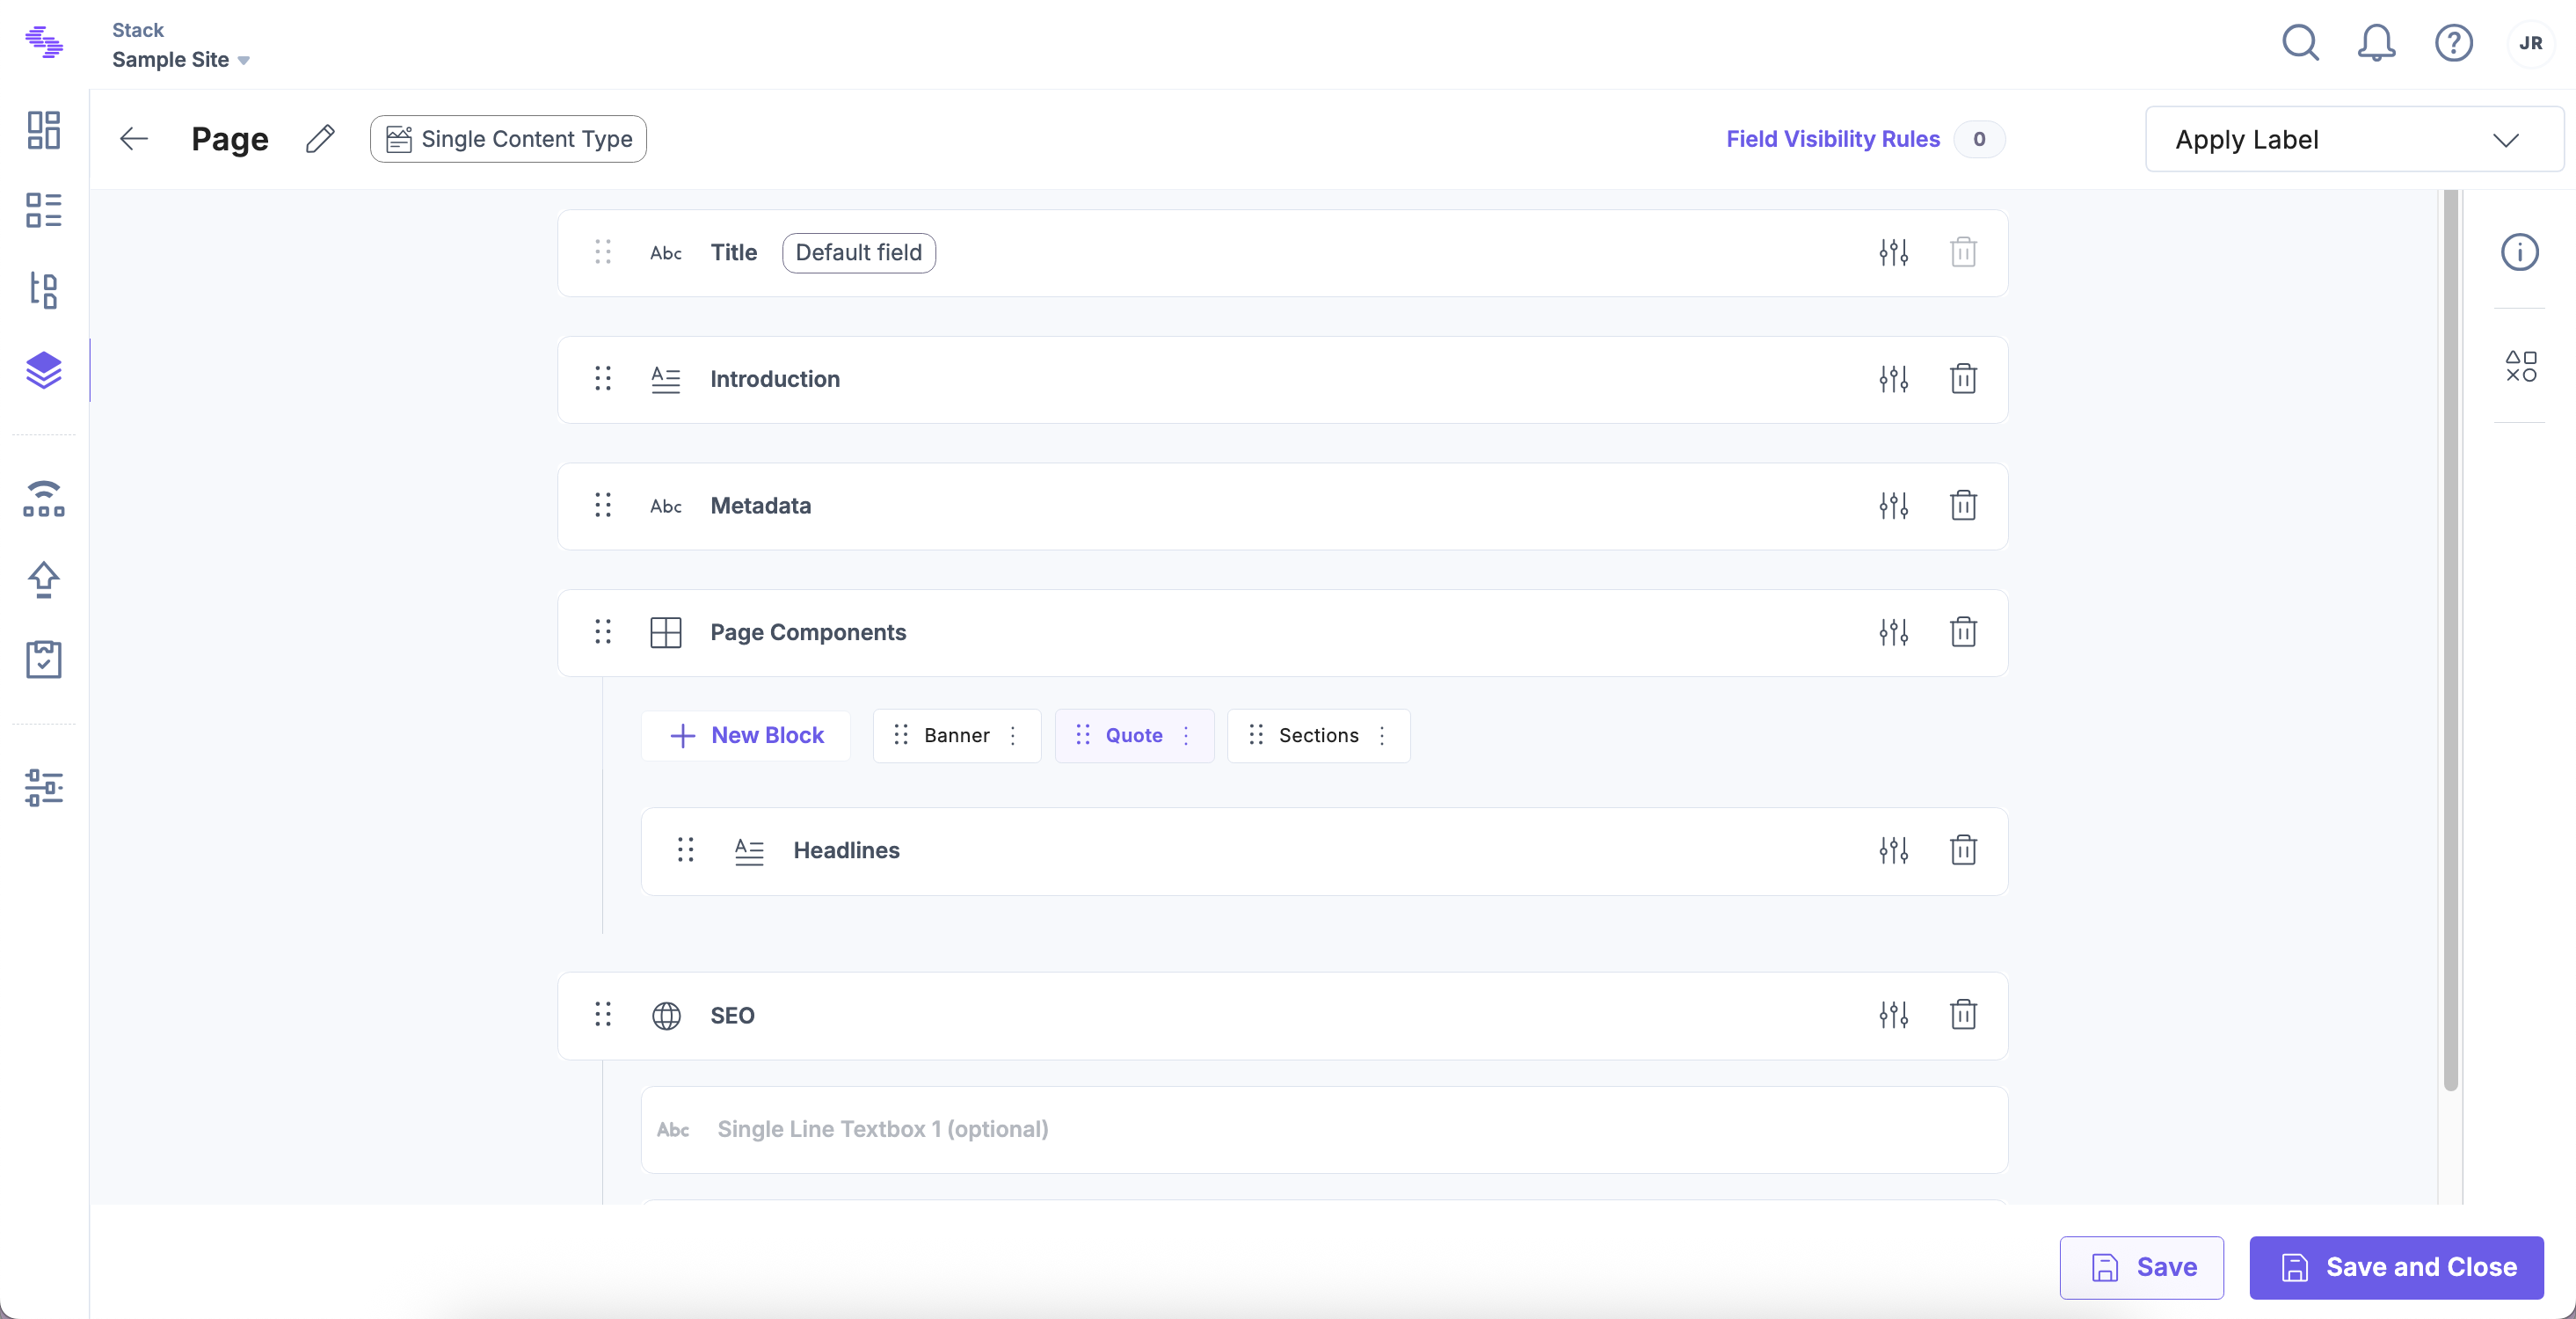
- Click + New Content Type and name it Page.
- Add common fields like Intro, Metadata, or SEO.
- Insert a Modular Blocks field and name it Page Components.
- Inside Page Components, create blocks like:
- Banner
- Quote
- Sections
- Content editors can structure and reorder components as needed.
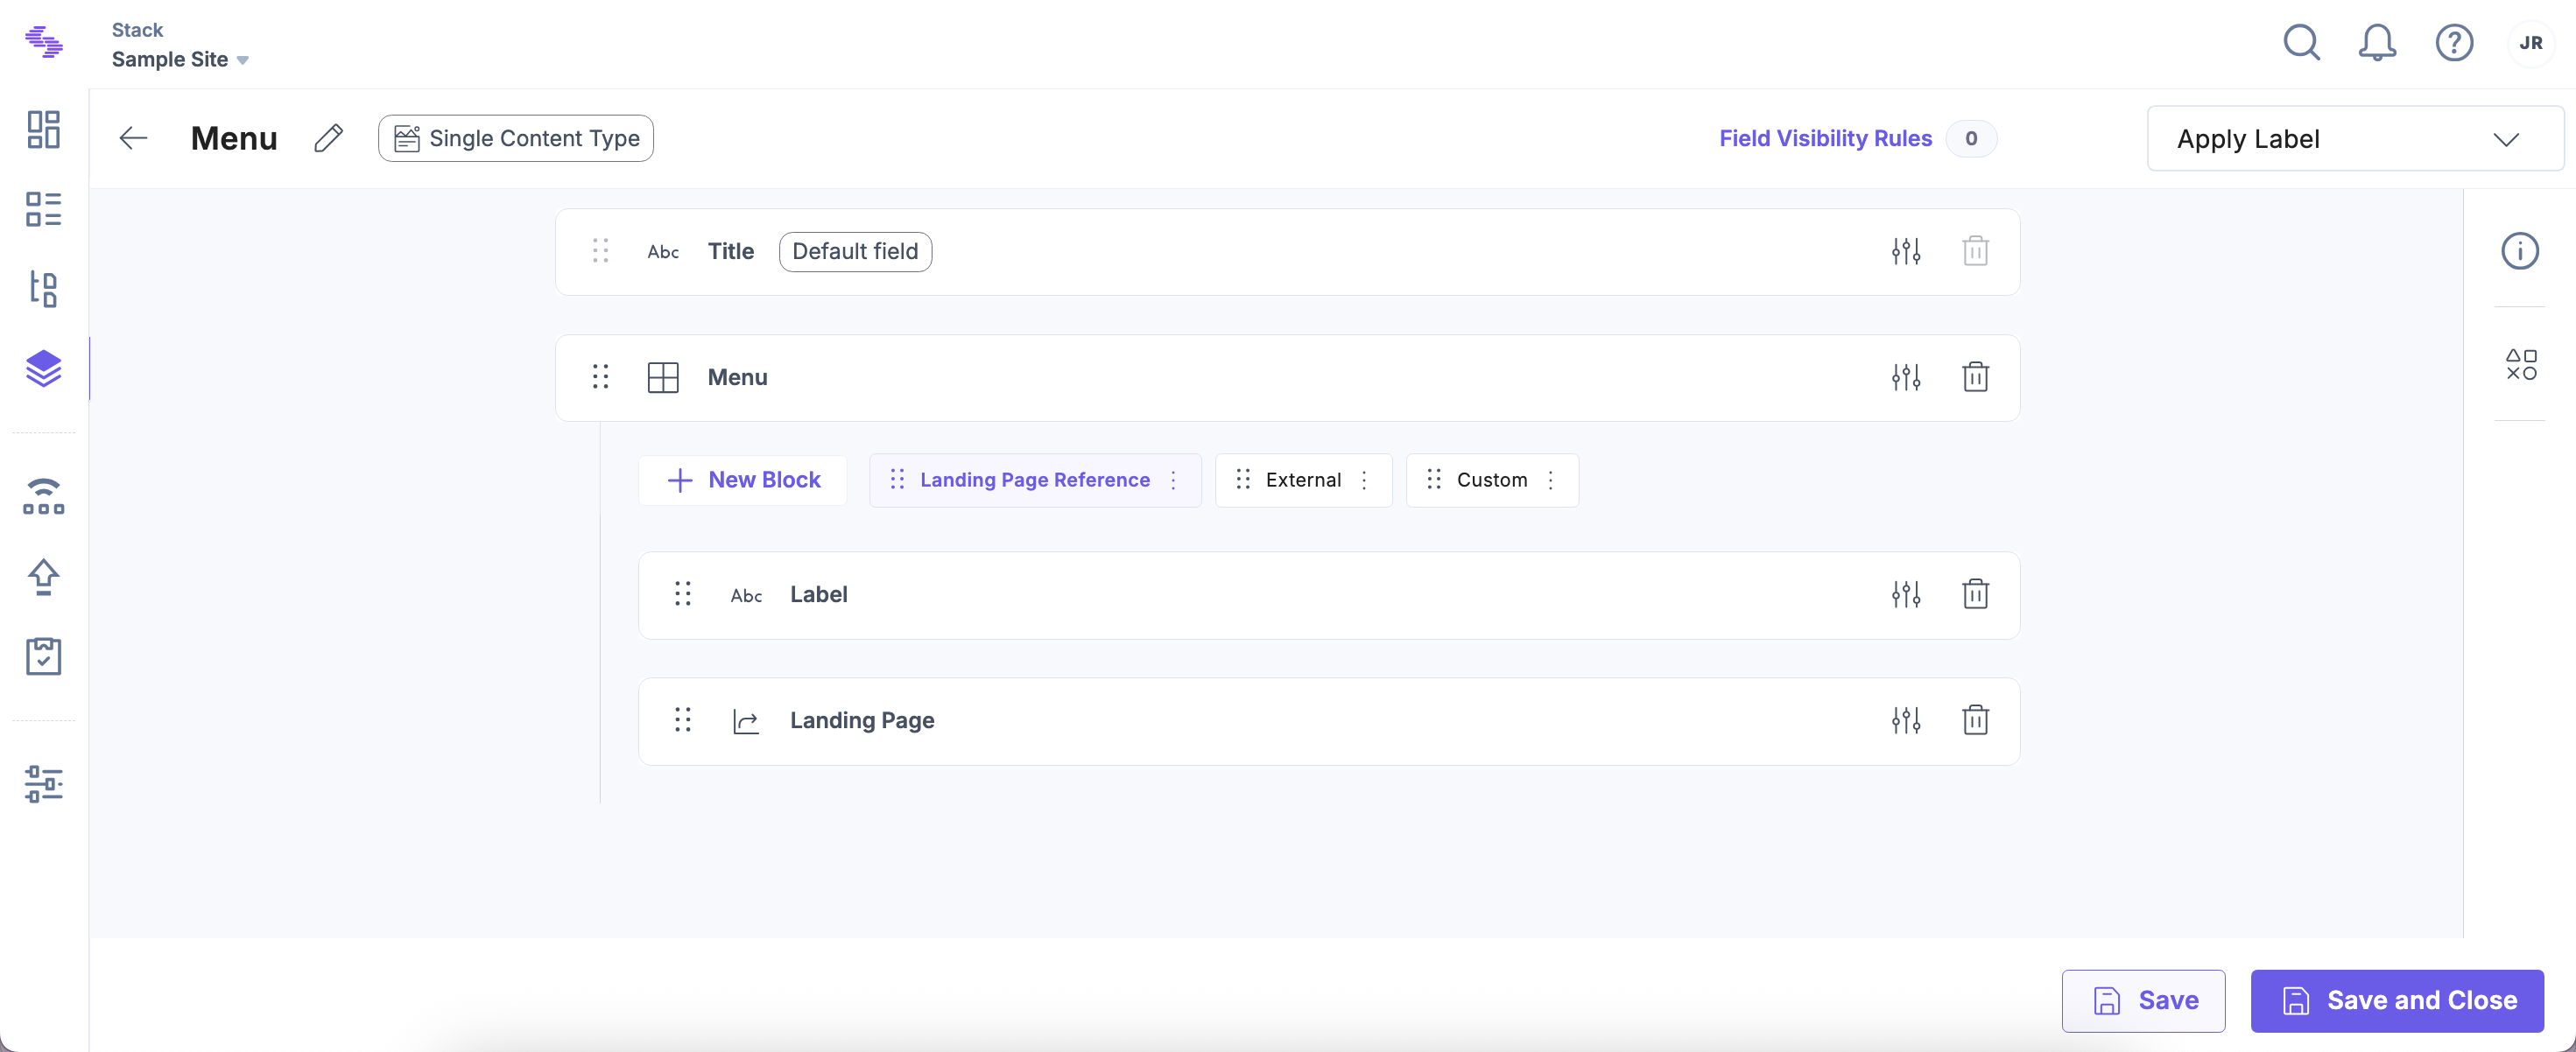
Example 2: Creating a Menu
You can use Modular Blocks to create a navigation menu with references to internal or external pages.
To create a menu using modular blocks, log in to your Contentstack account, and perform the following steps:
- Go to your stack and click the “Content Models” icon.
- Click + New Content Type and name it Landing Page.
- Add fields like:
- Title (default)
- JSON Rich Text Editor (Main Text)
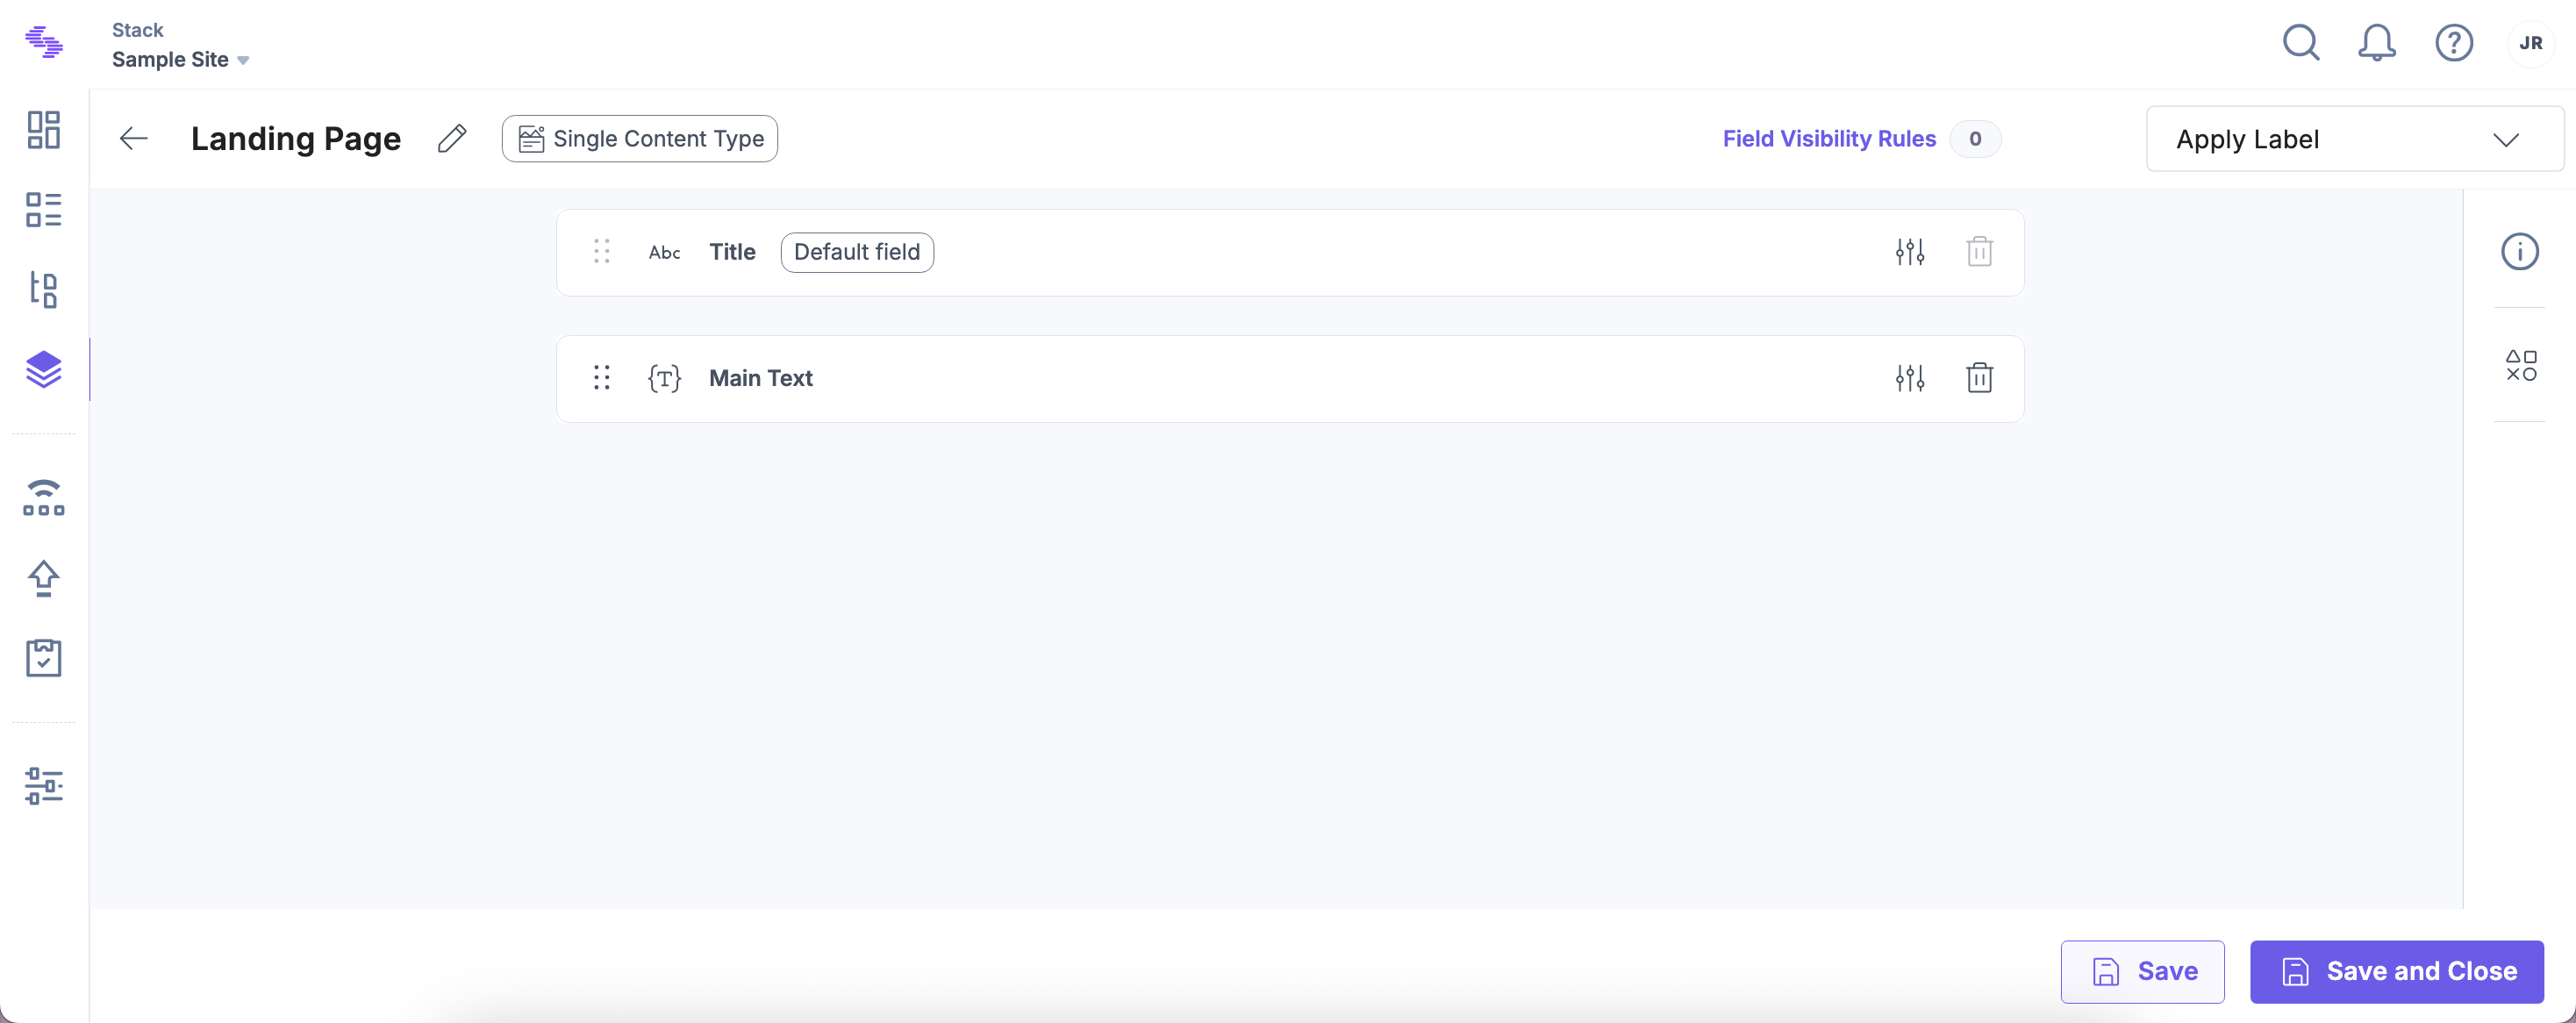
- Click Save and Close to save your content type.
- Now, create another content type named Menu.
- Insert a Modular Blocks field and name it Menu.
- Inside Menu, create blocks:
- Landing Page Reference: Single Line Textbox (Label) and Reference field (linked to Landing Page)
- External: Single Line Textbox and Link field
- Custom: Two Single Line Textboxes (Label, Path)
Now that we are done creating our content types, let's create entries in them and see modular blocks in action.
- Navigate to “Entries” and create a new entry in the Landing Page content type.
- Create two entries namely, Frontpage and About.
- In the Menu content type, create an entry with:
- Landing Page Reference title as Home and reference Frontpage.
- Add another block with the title About referencing the About entry.
- Within External, set the title as Contentstack and the URL as https://contentstack.com.
- Within Custom keep the title as Docs with the Path as /documentation/start.
Tip: The Custom block allows linking to any internal path (e.g., /some-other-link/on-my-webpage).
You can now use the Content Delivery API to retrieve the Menu entry content and build your navigation dynamically. For example, refer to this example.
Example 3: Light Geo-Segmentation
To show different content based on user location, create a content type with blocks like:
- India
- USA
- Europe
Each block can hold region-specific content. Editors can structure content accordingly.
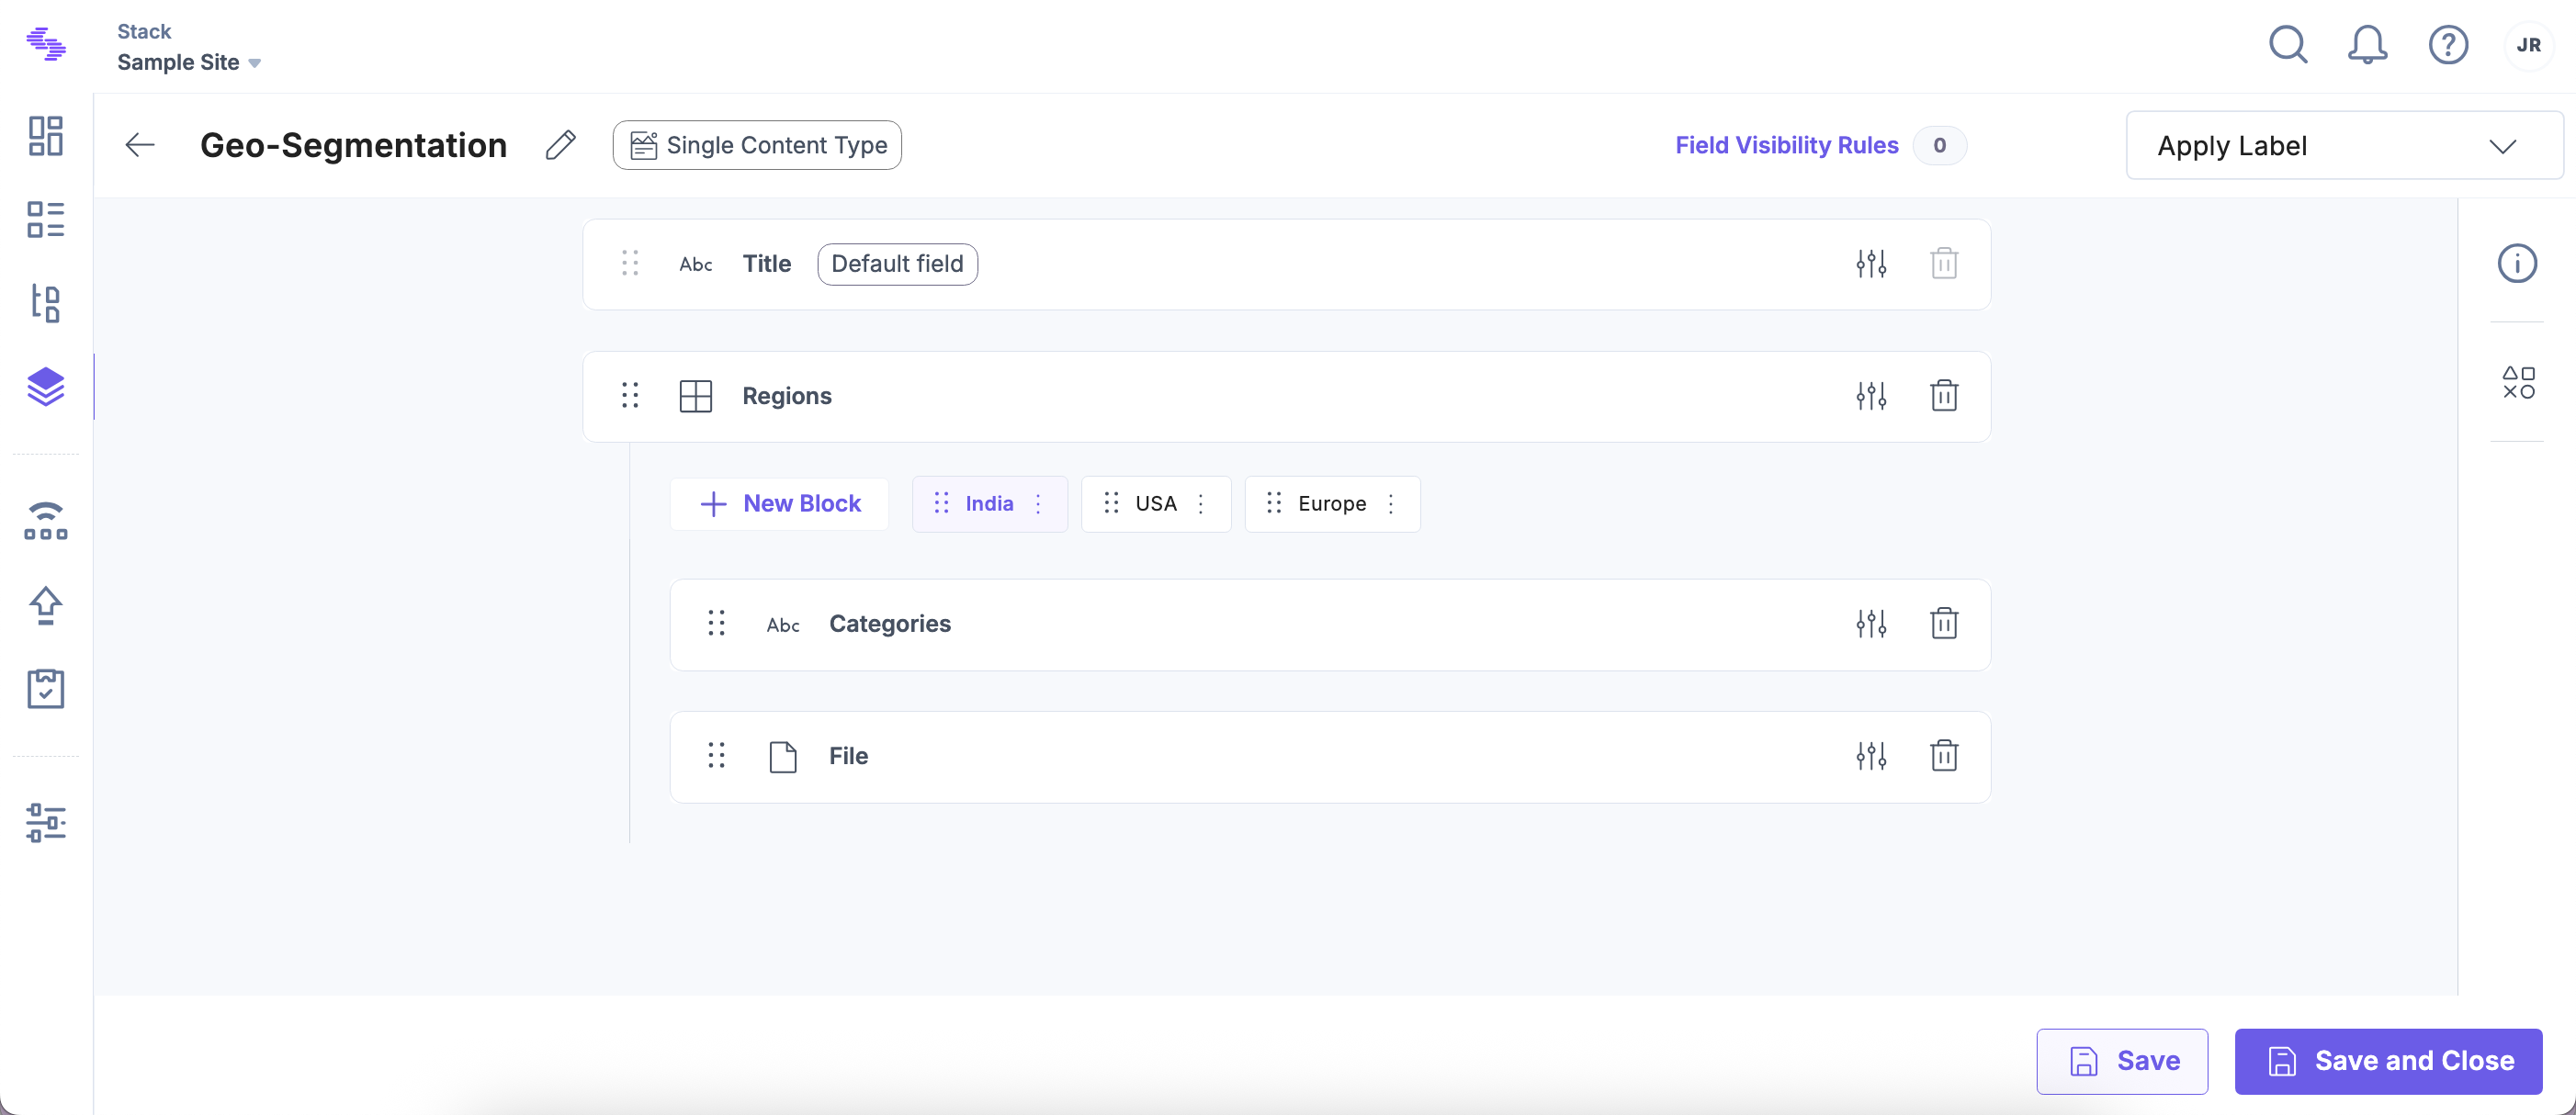
Note: Modular Blocks enable content structure. Actual geo-segmentation logic (based on IP) needs to be implemented externally.
Nested Modular Blocks
You can nest a Modular Blocks field inside a block of another Modular Blocks field, allowing even greater flexibility.
Let’s say you want to let authors:
- Create a standard news article with optional fields like image, description, and body content.
- Or create a photo gallery with multiple image uploads.
To create nested modular blocks, log in to your Contentstack account, and perform the following steps:
- Go to your stack and click the “Content Models” icon.
- Create a new or select an existing content type.
- Add a Modular Blocks field named Article Type.
- Create two blocks:
- News Articles that contains a nested Modular Blocks field with:
- Image Block (File field)
- Description Block (Single Line Textbox)
- Body Block (RTE)
- Image Gallery that contains a File field with Multiple enabled.
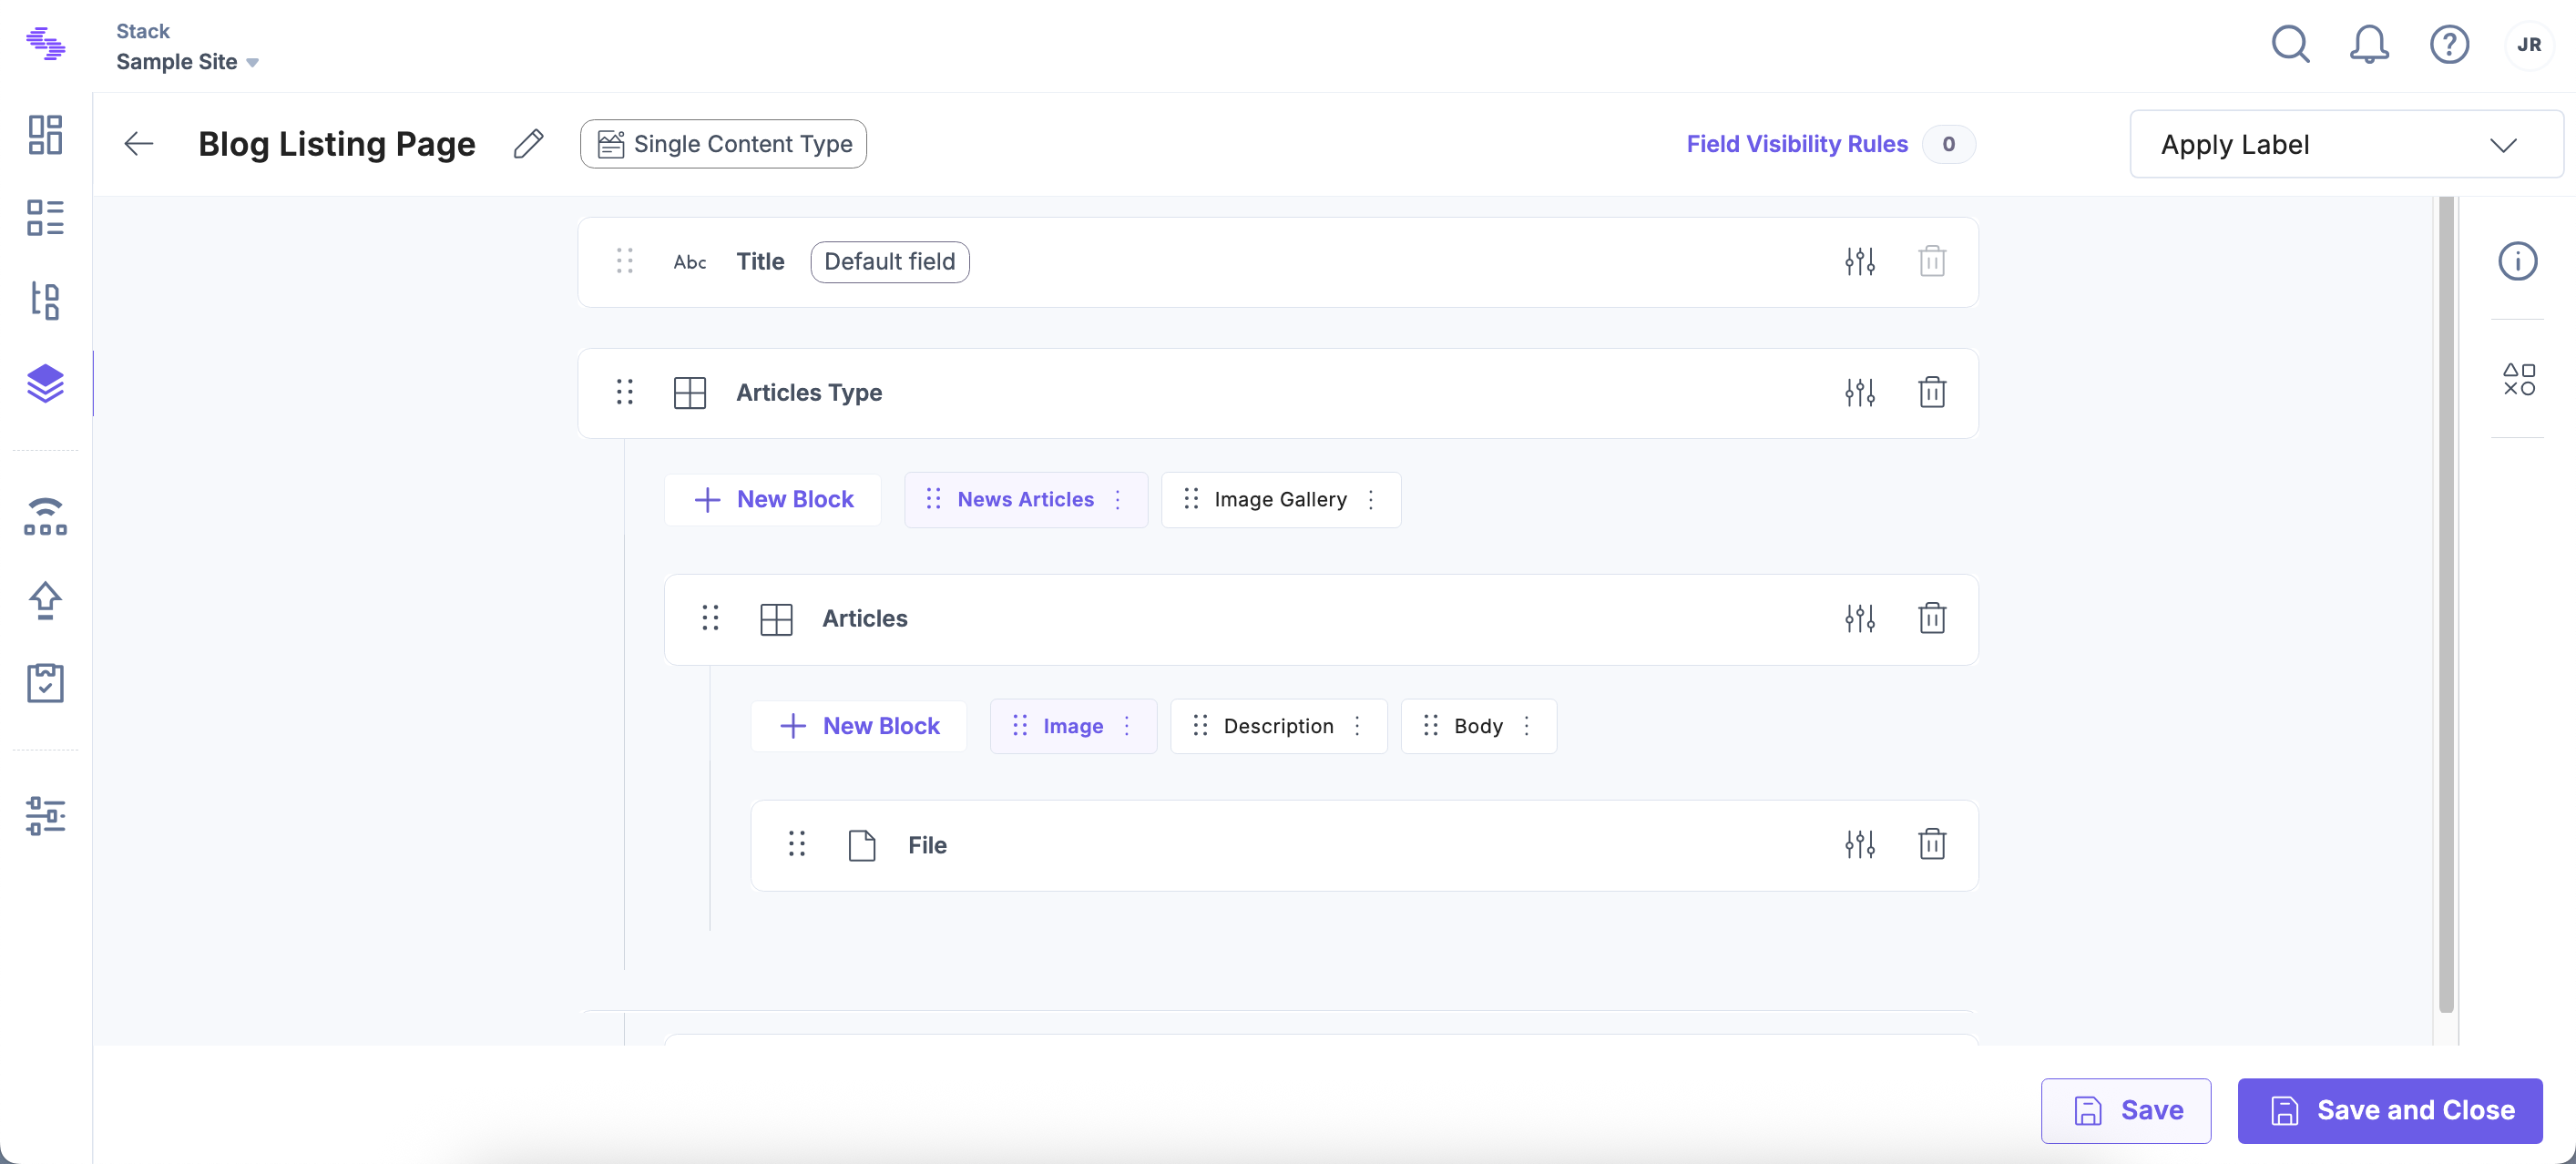
- News Articles that contains a nested Modular Blocks field with:
- Only two levels of nesting are supported.
- Maximum of 20 blocks can be added per Modular Blocks field.
Now, while creating entries, authors can choose between article or gallery and structure the content using reusable patterns.
- Open the entry and scroll to the Modular Blocks field.
- Click a block name (e.g., News Articles) to add it.
- Inside it, select a nested block from the defined list (e.g., Image Block).
- Repeat or reorder blocks as needed.
Note: You can add up to 30 block instances inside a nested Modular Blocks field.
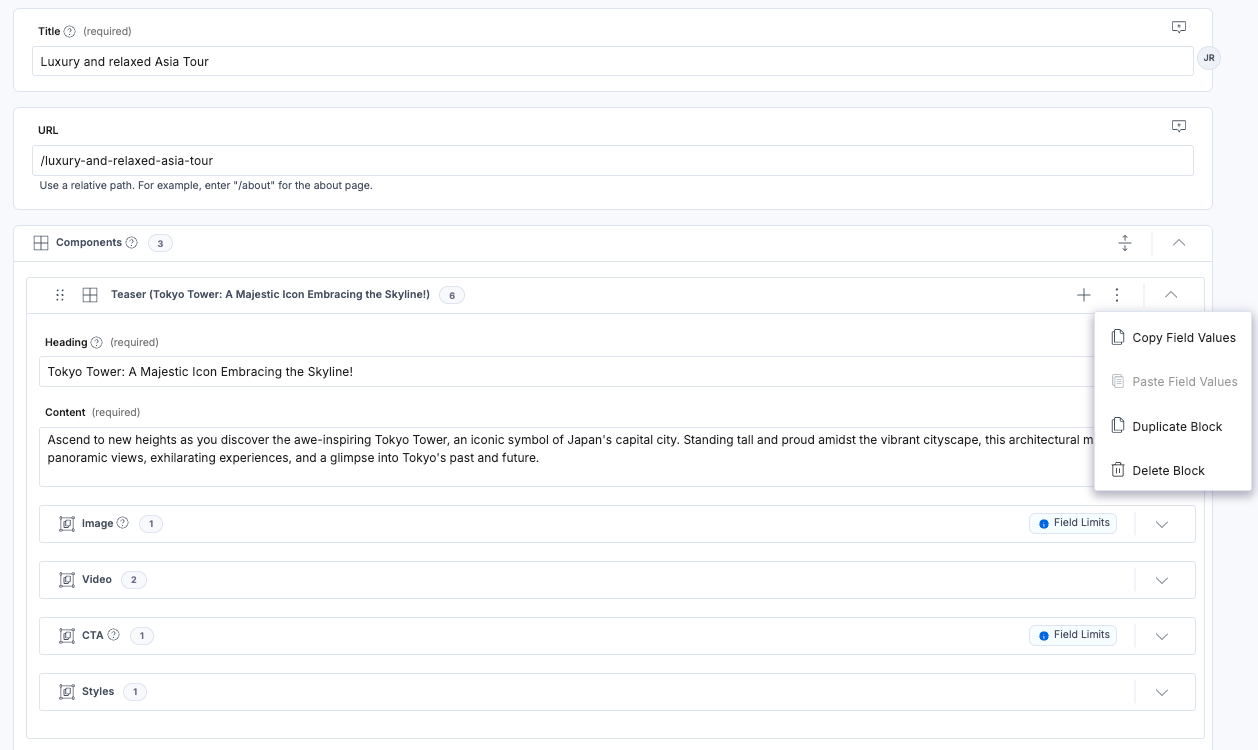
Copy Field Values Across Modular Blocks
Content managers can also copy the values of a block within a Modular Blocks field and paste them into:
- Another block in the same entry
- A block in the same Modular Blocks field in a different entry
This simplifies content duplication and speeds up entry creation.
To copy and paste field values across modular blocks, log in to your Contentstack account and perform the following steps:
- In the Modular Blocks field, hover over the desired block.
- Click the vertical ellipsis and select Copy Field Values.
- In the target entry or block, click the vertical ellipsis again and select Paste Field Values.
Note: The destination block must match the original block’s name and structure.
Limitations of Modular Blocks
- You can add a maximum of five Modular Blocks fields in a single content type.
- Each Modular Blocks field can contain up to 100 block definitions.
- Only two levels of nesting are allowed within Modular Blocks fields.
- A nested Modular Blocks field can include up to 20 block definitions.
- A content type can include a maximum of 100 fields in total, including all Modular Blocks fields, block definitions, and nested fields.
- You can add up to 100 block instances within a Modular Blocks field while creating an entry.
- A nested Modular Blocks field supports up to 30 block instances per entry.
Additional Resources:
- Learn about best practices for adding Modular Blocks in our dedicated guide.
- Read our Modular Blocks validation guide to understand how to implement validation rules effectively.
- Explore our comprehensive documentation on Field Visibility Rules to control how fields appear based on user input.
More articles in "Fields"
